Thursday 21 May 2015

Editing A Coloured Scan For My Blog

Here is the original un-edited photograph of my work. File Size: 8.72 MB, File Format: JPEG

I cropped the image to begin with, removing the excess area and leaving me with the desired sketches instead. Next, I adjusted the levels slightly to correct the exposure and then used the Colour Balance tool to correct the colour cast. Now, I had to resize the image to allow it to fit onto my blog. This was down by resampling the pixel size from (1017 pixels width x 929 pixels height) to (800 pixels width by 600 pixels height). Finally I turned resampling off to adjust the resolution from 300 dpi to 72dpi to reduce file size, and saved it as a JPEG with medium quality.


Here is the edited image of my work. File Size: 32 KB, File Format: JPEG

Editing A Scan For My Blog


Here is the original un-edited scan of my work. File Size: 7.43 MB, File Format: JPEG

First I cropped the image quite a bit as I wanted to focus on a few sketches rather than the whole piece. Next, I made some adjustments to the brightness and contrast to try and correct the exposure. As it was a sketch I didn't need to adjust the colour balance thankfully and instead moved onto resizing the image instead to allow it to fit onto the blog. This was done by resampling the pixel size from (907 pixels width x 1603 pixels height) to (600 pixels width x 800 pixels height). The final thing I needed to was to adjust the resolution, by turning resampling off, from 300 dpi to 72 dpi to, once again, reduce the file size, and from there I saved it as a JPEG with medium quality to also reduce file size.


Here is the edited image. File Size: 67 KB, File Format: JPEG


Wednesday 20 May 2015

Copyright

Who owns the Copyright of a Photograph?
  • A photograph is classed as a Work of Art.
  • The Photographer who created the picture owns the Copyright of the image.
  • Or a Company could own it if the Photographer is in the employment of the company, and takes the photograph as a part of his or her contractual duties.

How would we infringe the Copyright of a Photograph?
  • By Copying it.
  • If we copy a photograph in any sort of manner (such as downloading it, making a photocopy, re-photographing it, scanning it, etc) we're infringing the photographer's Copyright, and thereby breaking the law.

How can we legally copy Photographic Images?
  • By gaining permission to do so from the photographer.
  • If we're not able to find who the photographer is after exhaustive searches, backed up by legal proof of search, then legal judgement can be made to class the photograph as 'An Orphan Work', thereby giving a company or individual copyright of the image until the creator of the image comes forth with proof of creation of the Work of Art.

How long does copyright of a Photograph last?
  • For 70 years beginning at the end of the year of the Photographer's death.

How can we protect our own images from being copied and used commercially?
  • By watermarking images that are to be in the public domain.
  • By ensuring that if your images are in the public domain they're traceable back to you.

Friday 24 April 2015

Adding A Watermark

Here is the original un-edited scan of my work. File Size: 729 KB, Formar: JPEG
Here is the original un-edited scan of my work. File Size: 729 KB, File Format: JPEG

This piece was a part of a series of characters I created for an animation project. The two pictured are humanised versions of the Rat (left) and Ox (right) of the zodiac. To begin with, I cropped this image to remove the excess of my sketchbook. Then I made some slight adjustments to the colour balance and levels in an attempt to hide more of the pencil image showing through the background.
Now that my image was to my liking, I made a new layer and used the text tool to add my watermark, which was my email address. Next, I changed the layer's opacity from 100% to 20% and adjusted the image size from (1206 pixels width by 1479 height) to (600 pixels width by 800 pixels height). Finally, I adjusted the resolution, from 150 dpi to 72 dpi and saved the image as a JPEG. 

Here is the edited file of my work, with added watermark.
File size: 152 KB, Format: JPEG


Friday 6 February 2015

Editing A Photo For My Blog

Here is the original un-edited photograph of my work. File Size: 2.3 MB, File Format: JPEG

First I cropped the image slightly to remove some of the excess area, then made some adjustments using the Transform/Skew tool. I recropped the image again slightly, using the crop tool and then moved on to trying to correct the camera exposure using the Levels tool. Once that was done, I made another slight adjustment with the Colour Balance to correct the colour cast. Next, I resized the image size so that the image would fit onto the blog. I did this by resampling the pixel size from (1881 pixels width x 1410 pixels height) to (800 pixels width x 600 pixels width). Finally, I adjusted the resolution, by turning resampling off, from 300 dpi to 72 dpi to reduce the file size, and saved it as a JPEG with medium quality to also reduce file size.


Here is the edited photograph of my work. File Size: 127KB, File Format: JPEG

Tuesday 20 May 2014

Creating An iPod in Cinema 4D

First, we had to create the actual iPod. I did this by adding a cube object to the stage and adjusting it's properties to shape it like an iPod. I then added a plane object and tube object to the stage and did the same, adjusting the properties of each object to suit the needs. In this case, the plane became the screen and the tube became the menu. I also needed to adjust the positions of the plane and tube, otherwise they'd both be center inside the iPod. Then, in the Objects Manager, I selected all  three objects and grouped them together. That way I could shift all three objects without hassle. I added another plane object next and adjusted it's properties to create a floor for the iPod to rest on.
Now, I had an iPod shape and floor for it to rest on but no colour. So, I created four new materials and changed the colours of two of them and the textures of the other two. The colours I changed were black to use as the floor colour and then green to use as my iPod's colour. As for the textures, I used two, premade textures, one of an iPod menu and the other of an iPod screen. Then, I applied each texture to each object.
Finally I added a light object to the stage and adjusted it's properties and position. Below is the finished result.


Tuesday 13 May 2014

Computers In Art And Design

Here are 10 examples of how Computers can be used in Art and Design, alongside the programs used.

       1. Websites

Websites are one of the most, if not the most, widely used examples of Computers in Art and Design. People can either set up their own website through other websites that host the site for either a small fee or even some do this for free. Usually this method is only for setting up a forum or a blog. Otherwise, you could use specific programs to create your website, such as Adobe Dreamweaver.


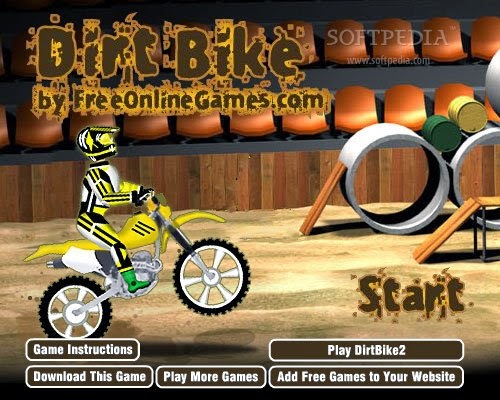
       2. Computer Games/Video Games

Specifically 3D Computer Games or Video Games. These are more widespread examples as almost everyone has either heard of, owned or at the very least played a Computer/Video Game. Companies exist to create these games and create new consoles to play them on, so there's a very large market with these. Valve is a good example, they produce many 3D titles, such as the Left 4 Dead series, the Half Life series (which saw the most improvement in terms of looks) and the Portal series. The most common software for creating these games is Autodesk 3ds Max


       3. 3D Movies

3D Movies have taken over the movie industry, replacing the old 2D animation styles. Disney, Pixar and Dreamworks are probably the biggest companies in the Industry but there are still many others out there. A good example of the software used to create this is Autodesk Maya


       4.  Advertisements
Adverts are everywhere in the world. In newspapers, on billboards, on the internet and so forth. There's quite a few programs you can use to create Advertisements but, the best known one is Photoshop, as there's a good range of tools to use.


       5. App Games
Almost everyone today has some form of mobile device. Smart Phones, Tablets, Kindles and so forth. And almost all of these devices have some form of App store that allows you to obtain these games. Whether they're free to play or purchased for a small fee,  App Games are a big part of modern society now. Most App Games are now created with Java.


       6. Flash Games
Flash Games can easily be found on the internet. They're games played in the web browser that can be small, addictive time wasters, or big adventure games and have a range of genres. Whether you're looking for a creepy horror game or a big RPG or even a cute little Barbie game for your children or siblings, Flash games cover it all. The biggest software used for this is Adobe Flash.


       7. Illustrations, Logos and Typography
All three of these things are seen world wide both on and offline. You can find them in newspapers, on TV during adverts, on websites and even flyers, for example. Each of these three can very easily become created in software such as Adobe Illustrator.


       8. Magazines and Newspapers
Magazines and Newspapers are widespread sources of information and gossip throughout the world. Whether you want to hear about a celebrity break up or about the financial state of the country, either piece of information is easily obtained. To create the layout for them, you can use Adobe InDesign


       9. Audio and Music
Music is everywhere. From catchy pop tunes and edgy rock ballads in the charts, to little jingles at the end of an advert that stick in your head, music is all over and comes in many varieties. To create the amazing (and sometimes not so amazing) songs we hear, you need the right kind of software, such as Avid Pro Tools.


      10. Film Making/Video Production and Special Effects
If you're trying to spice up your little home movie or trying to create a serious project you need the right kind of Special Effects. While you can always use free software, like Windows Movie Maker, you don't quite get the professional looking effects. For those, you'll need something more like Adobe After Effects, Apple Final Cut or even Sony Vegas Pro.